How To Post To Instagram From Your Computer
In June 2021, Facebook finally provided photographers with the option to post pictures to their Instagram accounts directly from their computers, rather than exclusively from their mobile devices.
The purpose of this document is to show you just how easy it is to do exactly that.
Steps For Posting Computer Photos To Instagram
Step 1: Using your web browser, log in to your Instagram account. You'll see a screen similar to the one below.
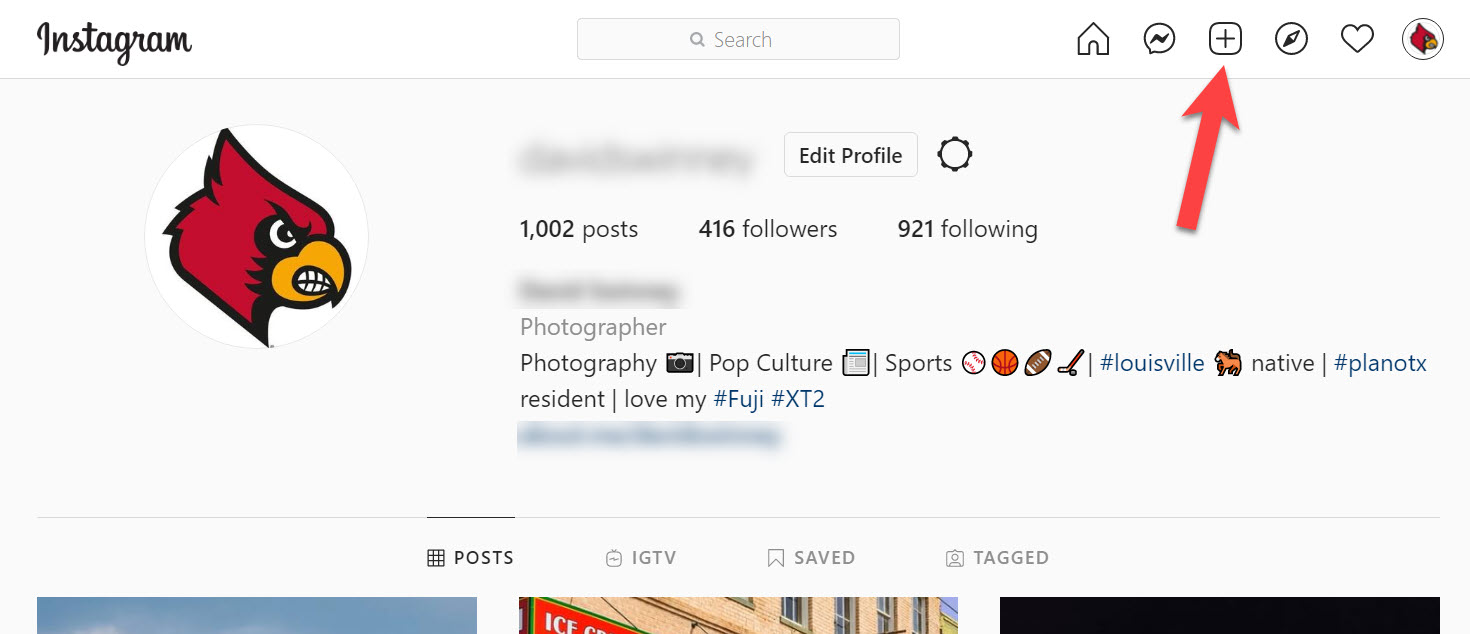
Step 2: Click the + sign at the top of the page.
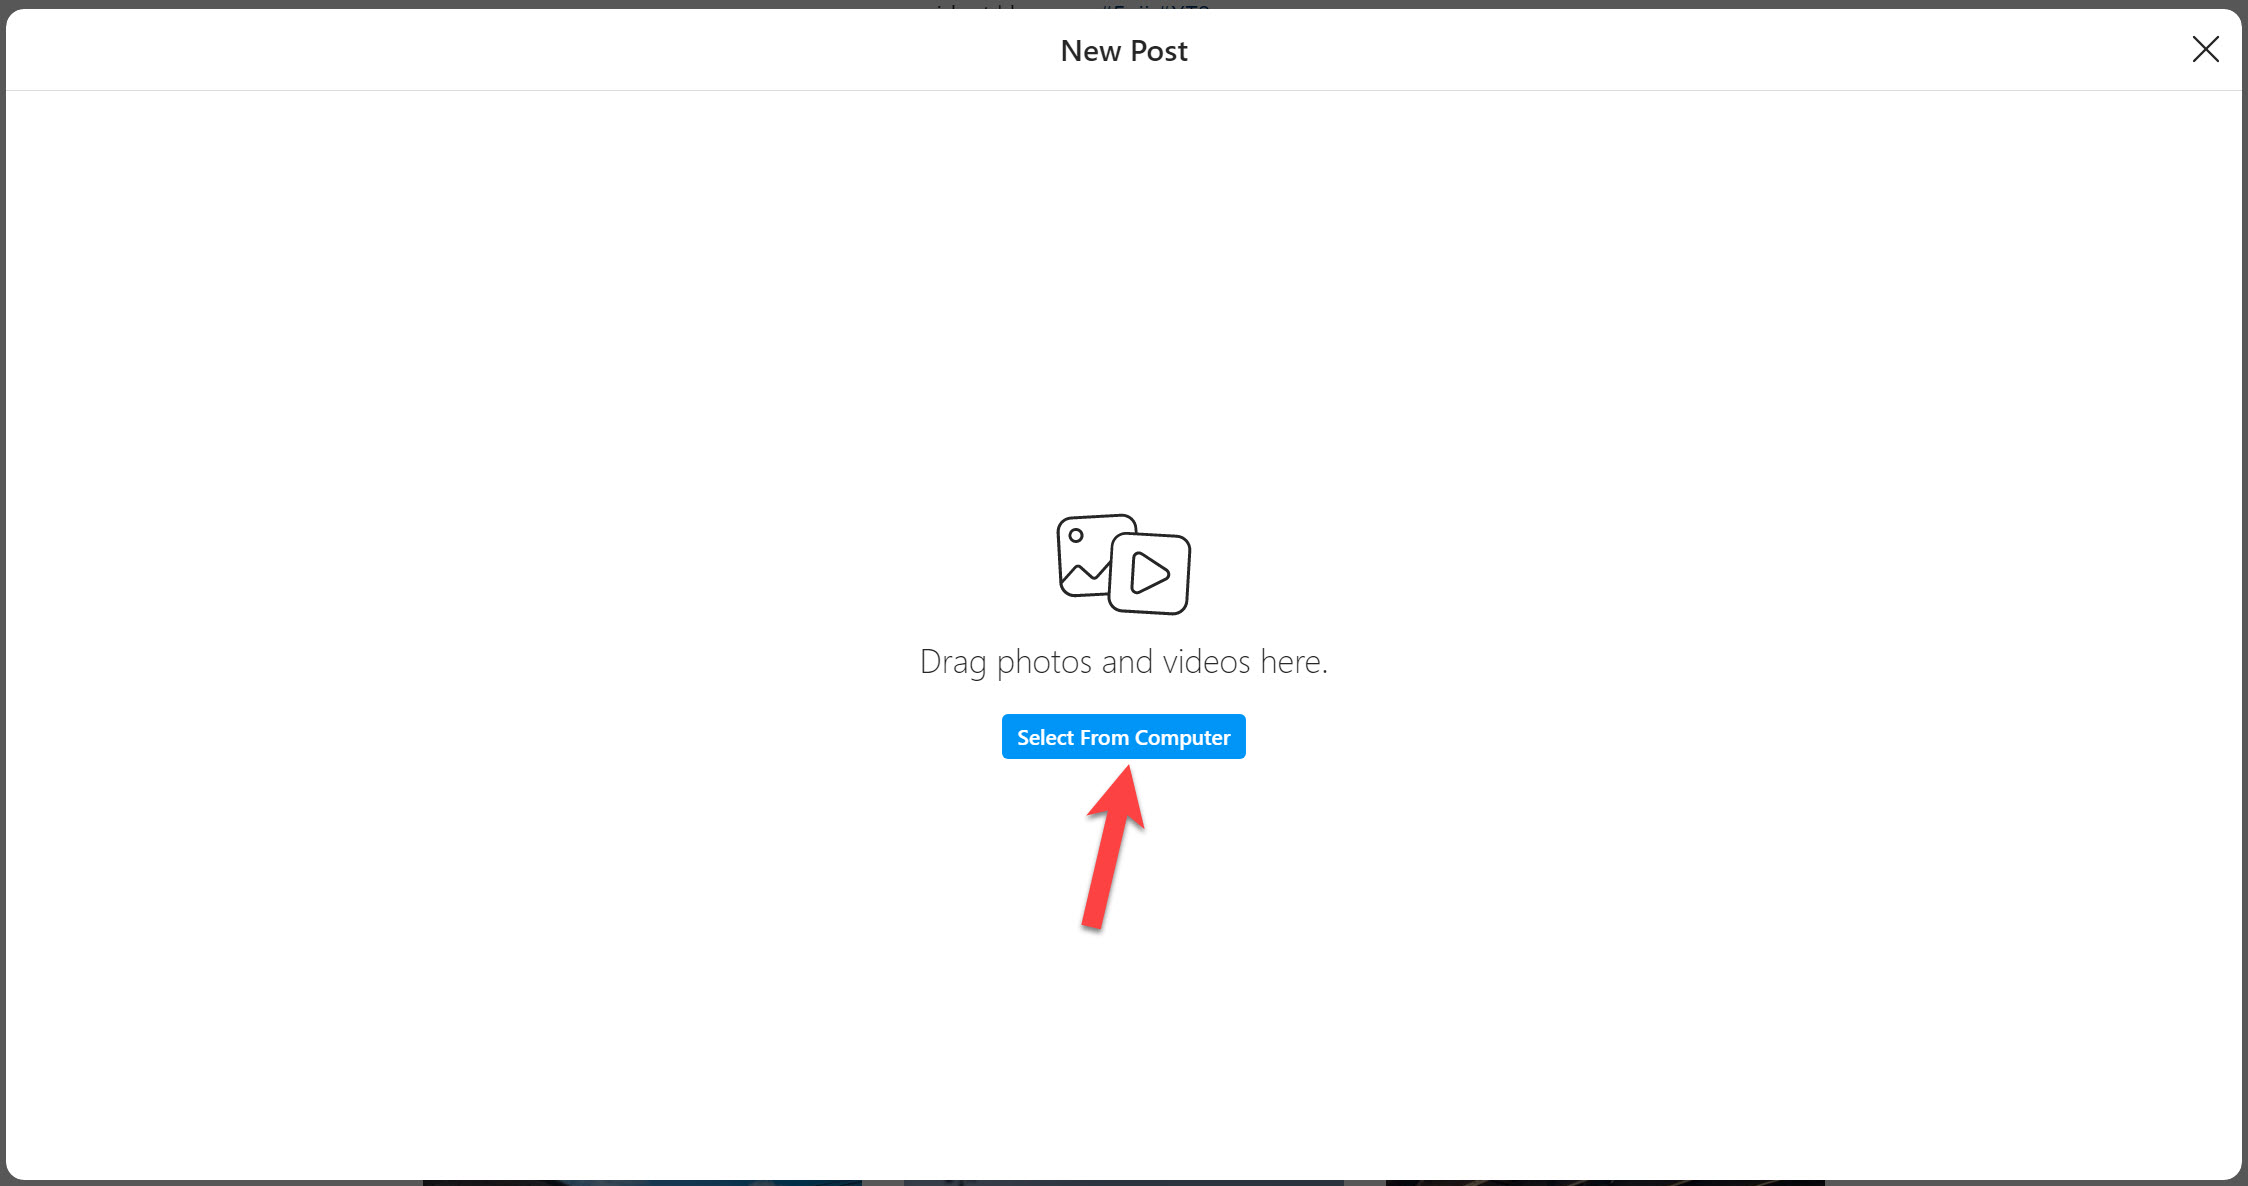
Step 3: Click on the Select from Computer button.
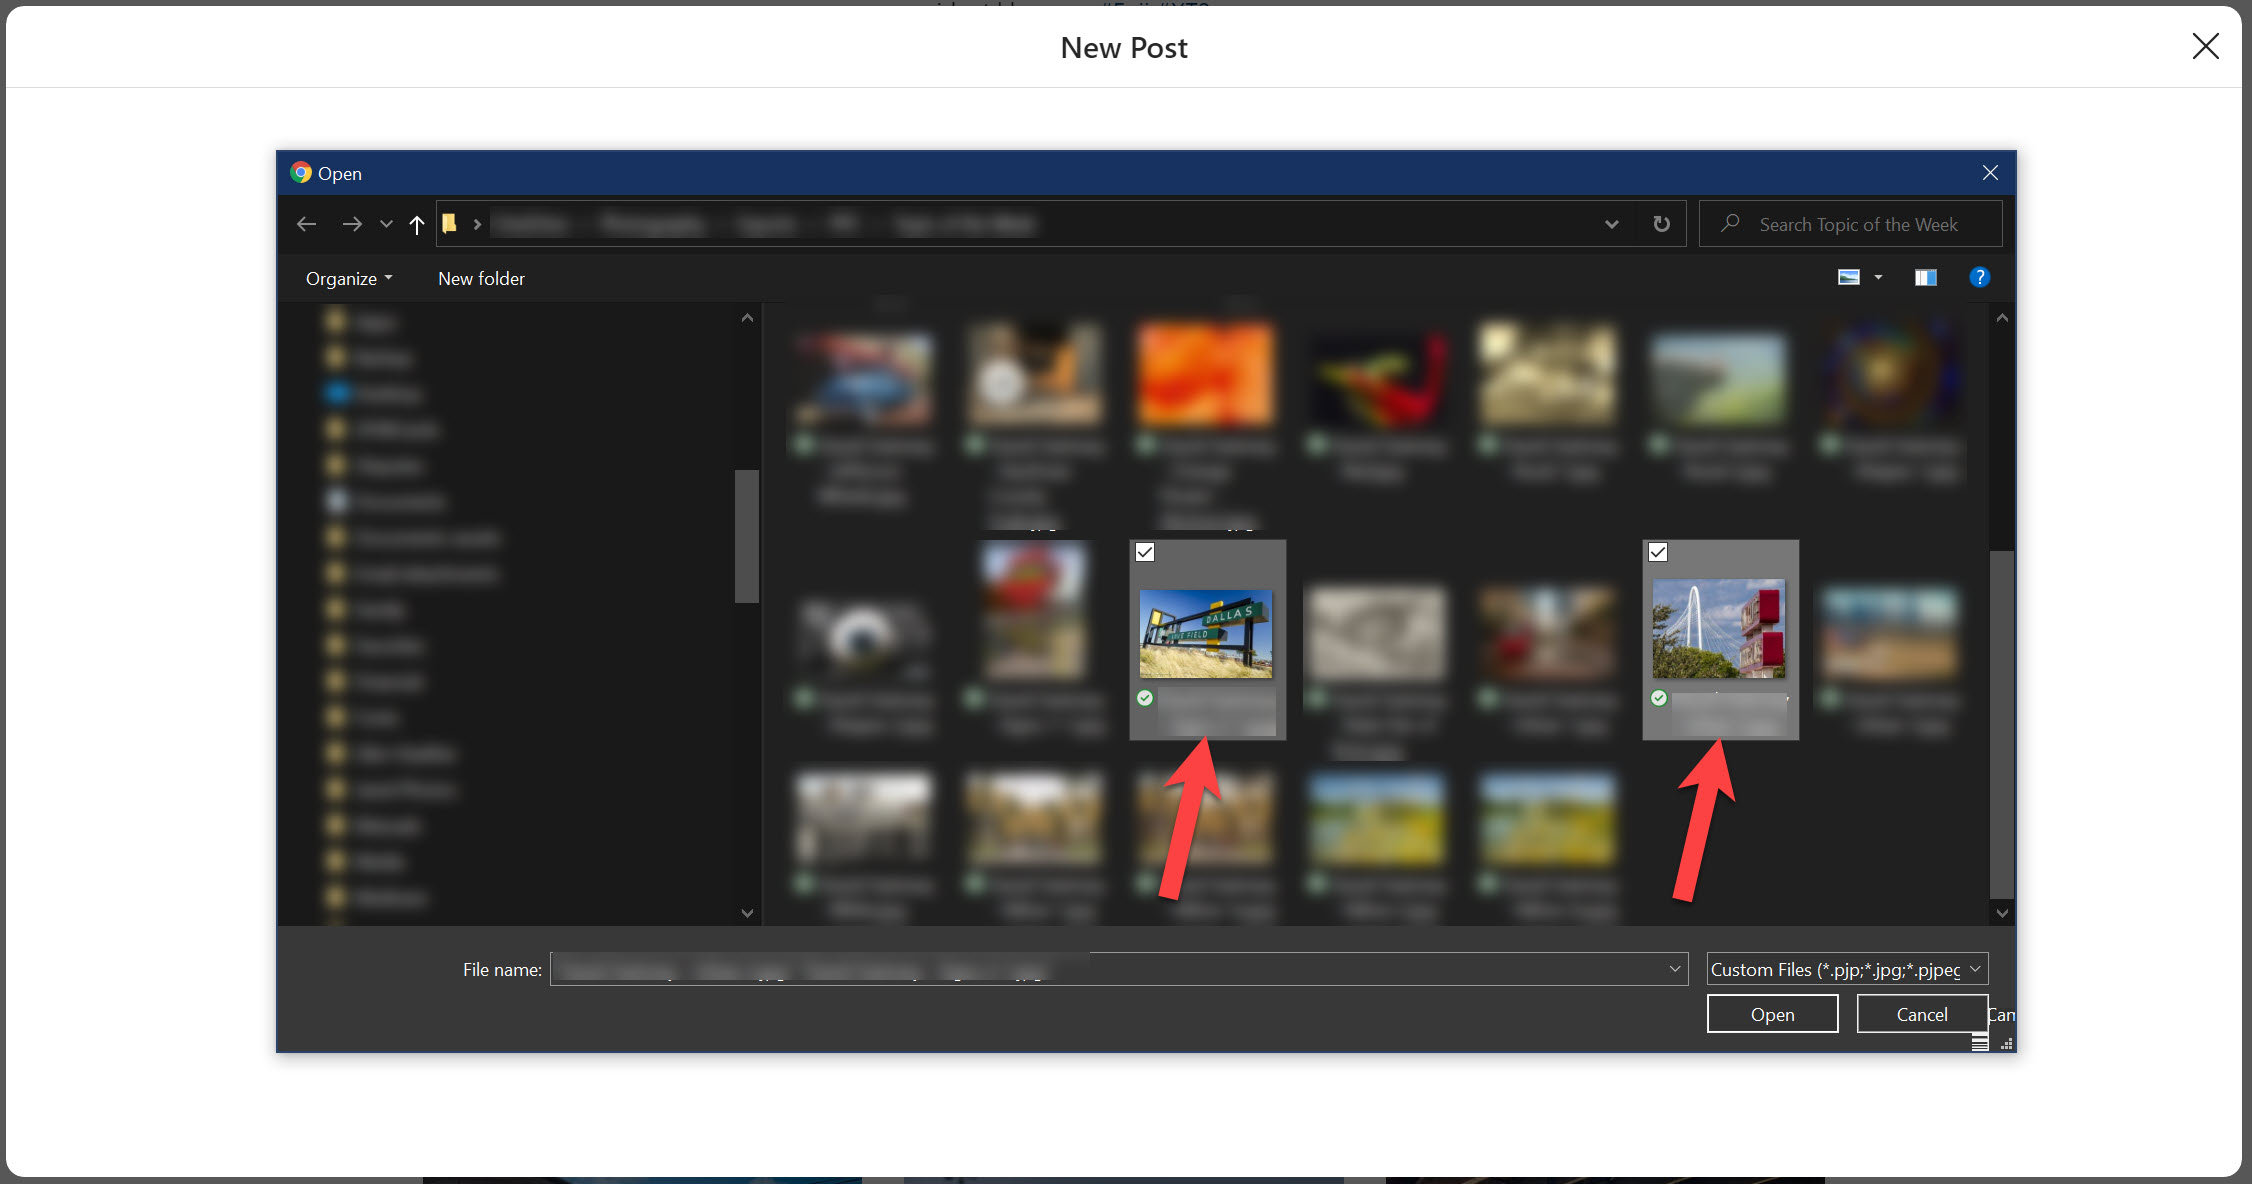
Step 4: Use Finder (Mac) or Explorer (Windows) to select the file(s) to be published. Alternatively, you can just drag-and-drop the picture(s)s in Step 3. Click the Next button to continue.
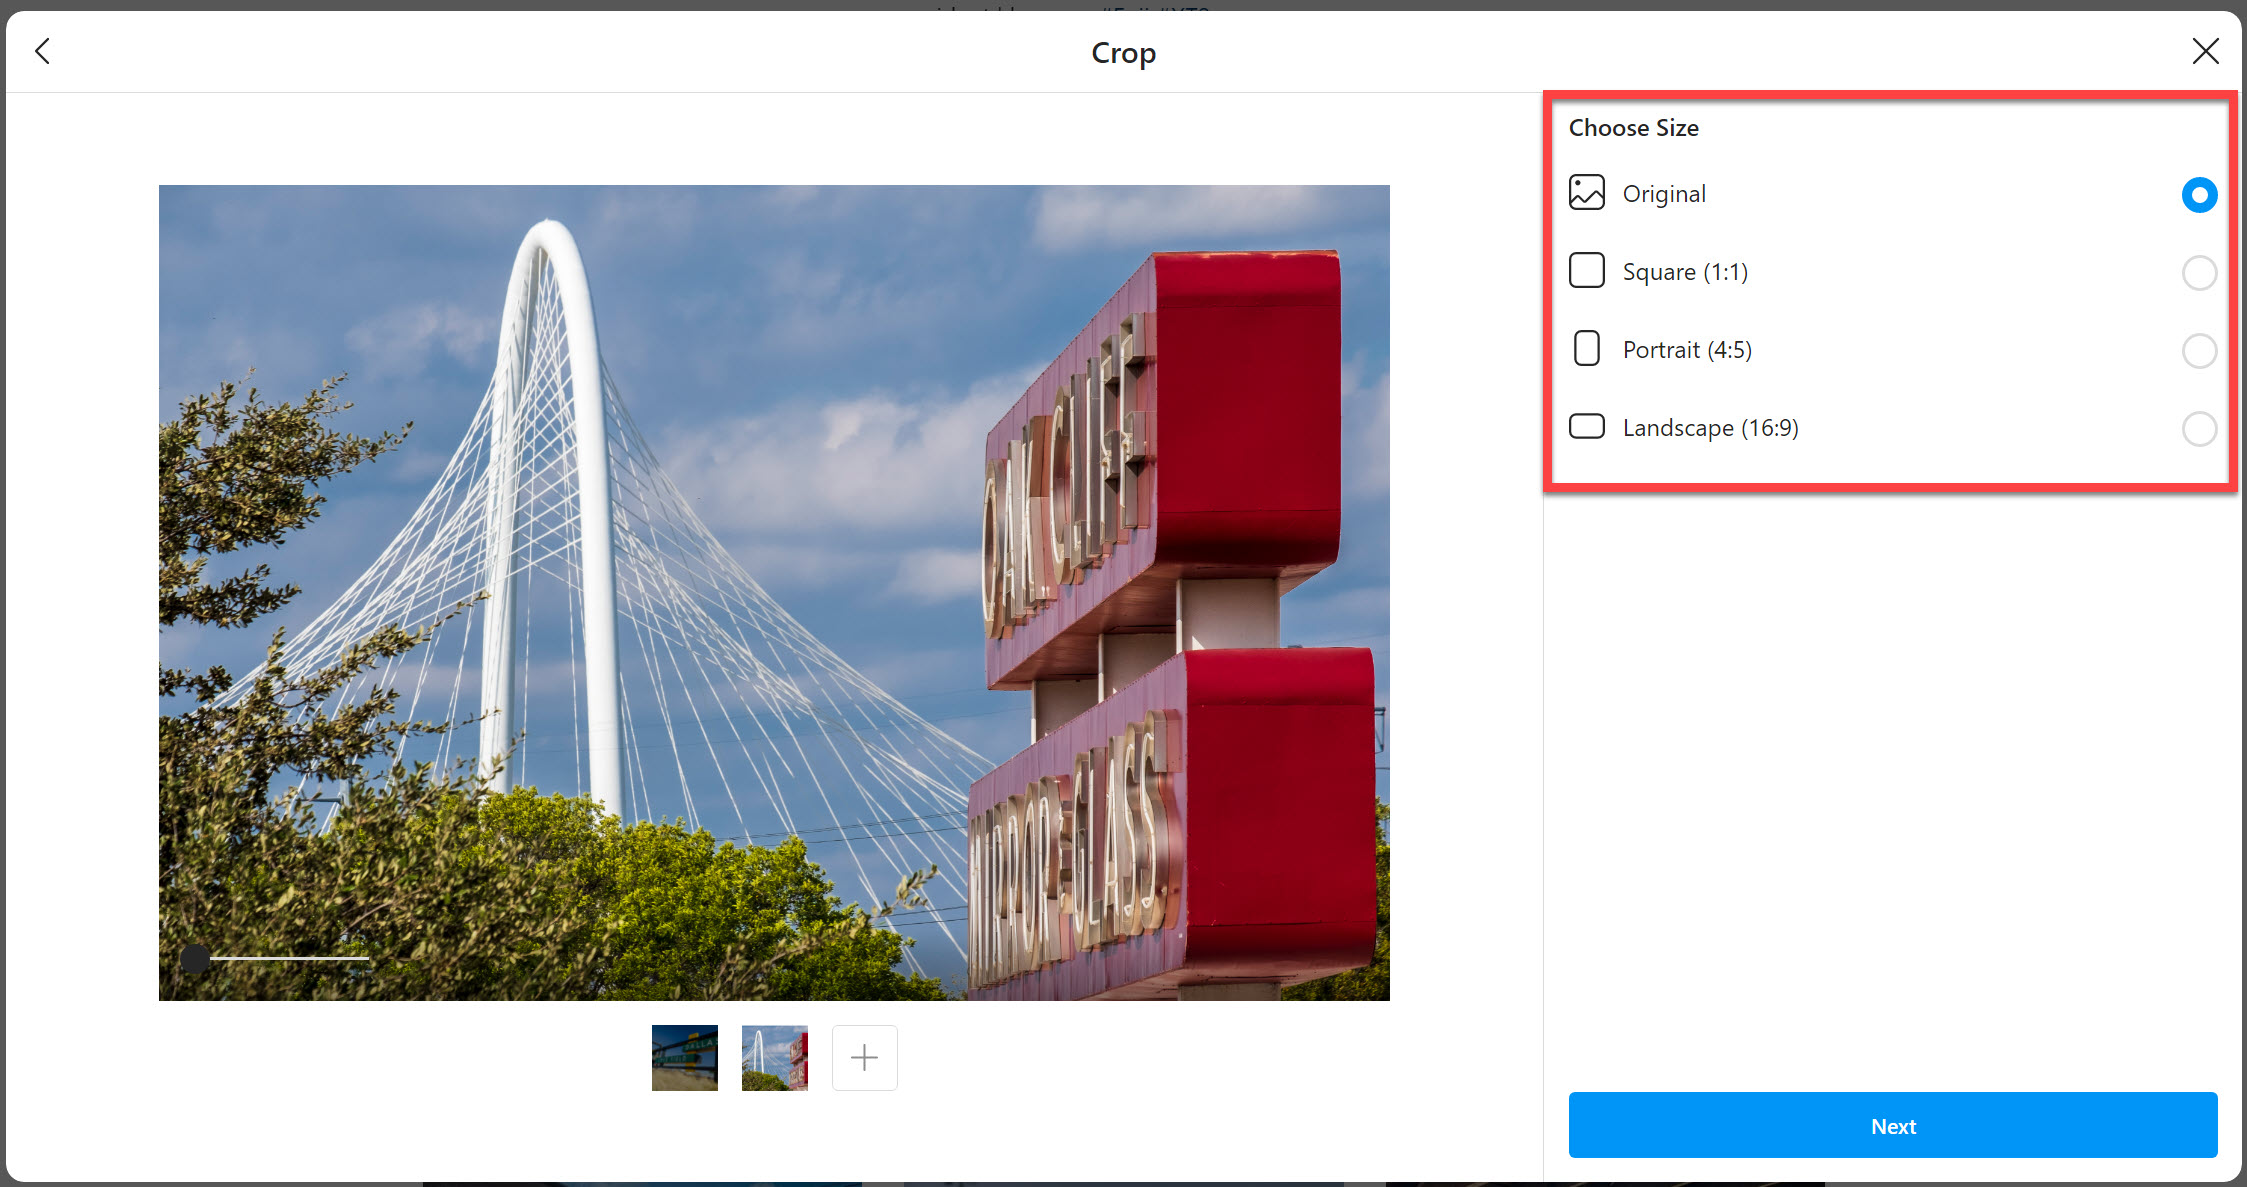
Step 5: Specify the desired shape (i.e., crop) the photo(s). Click the Next button to continue.
Step 6: Apply a Filter to the photo(s), if desired.
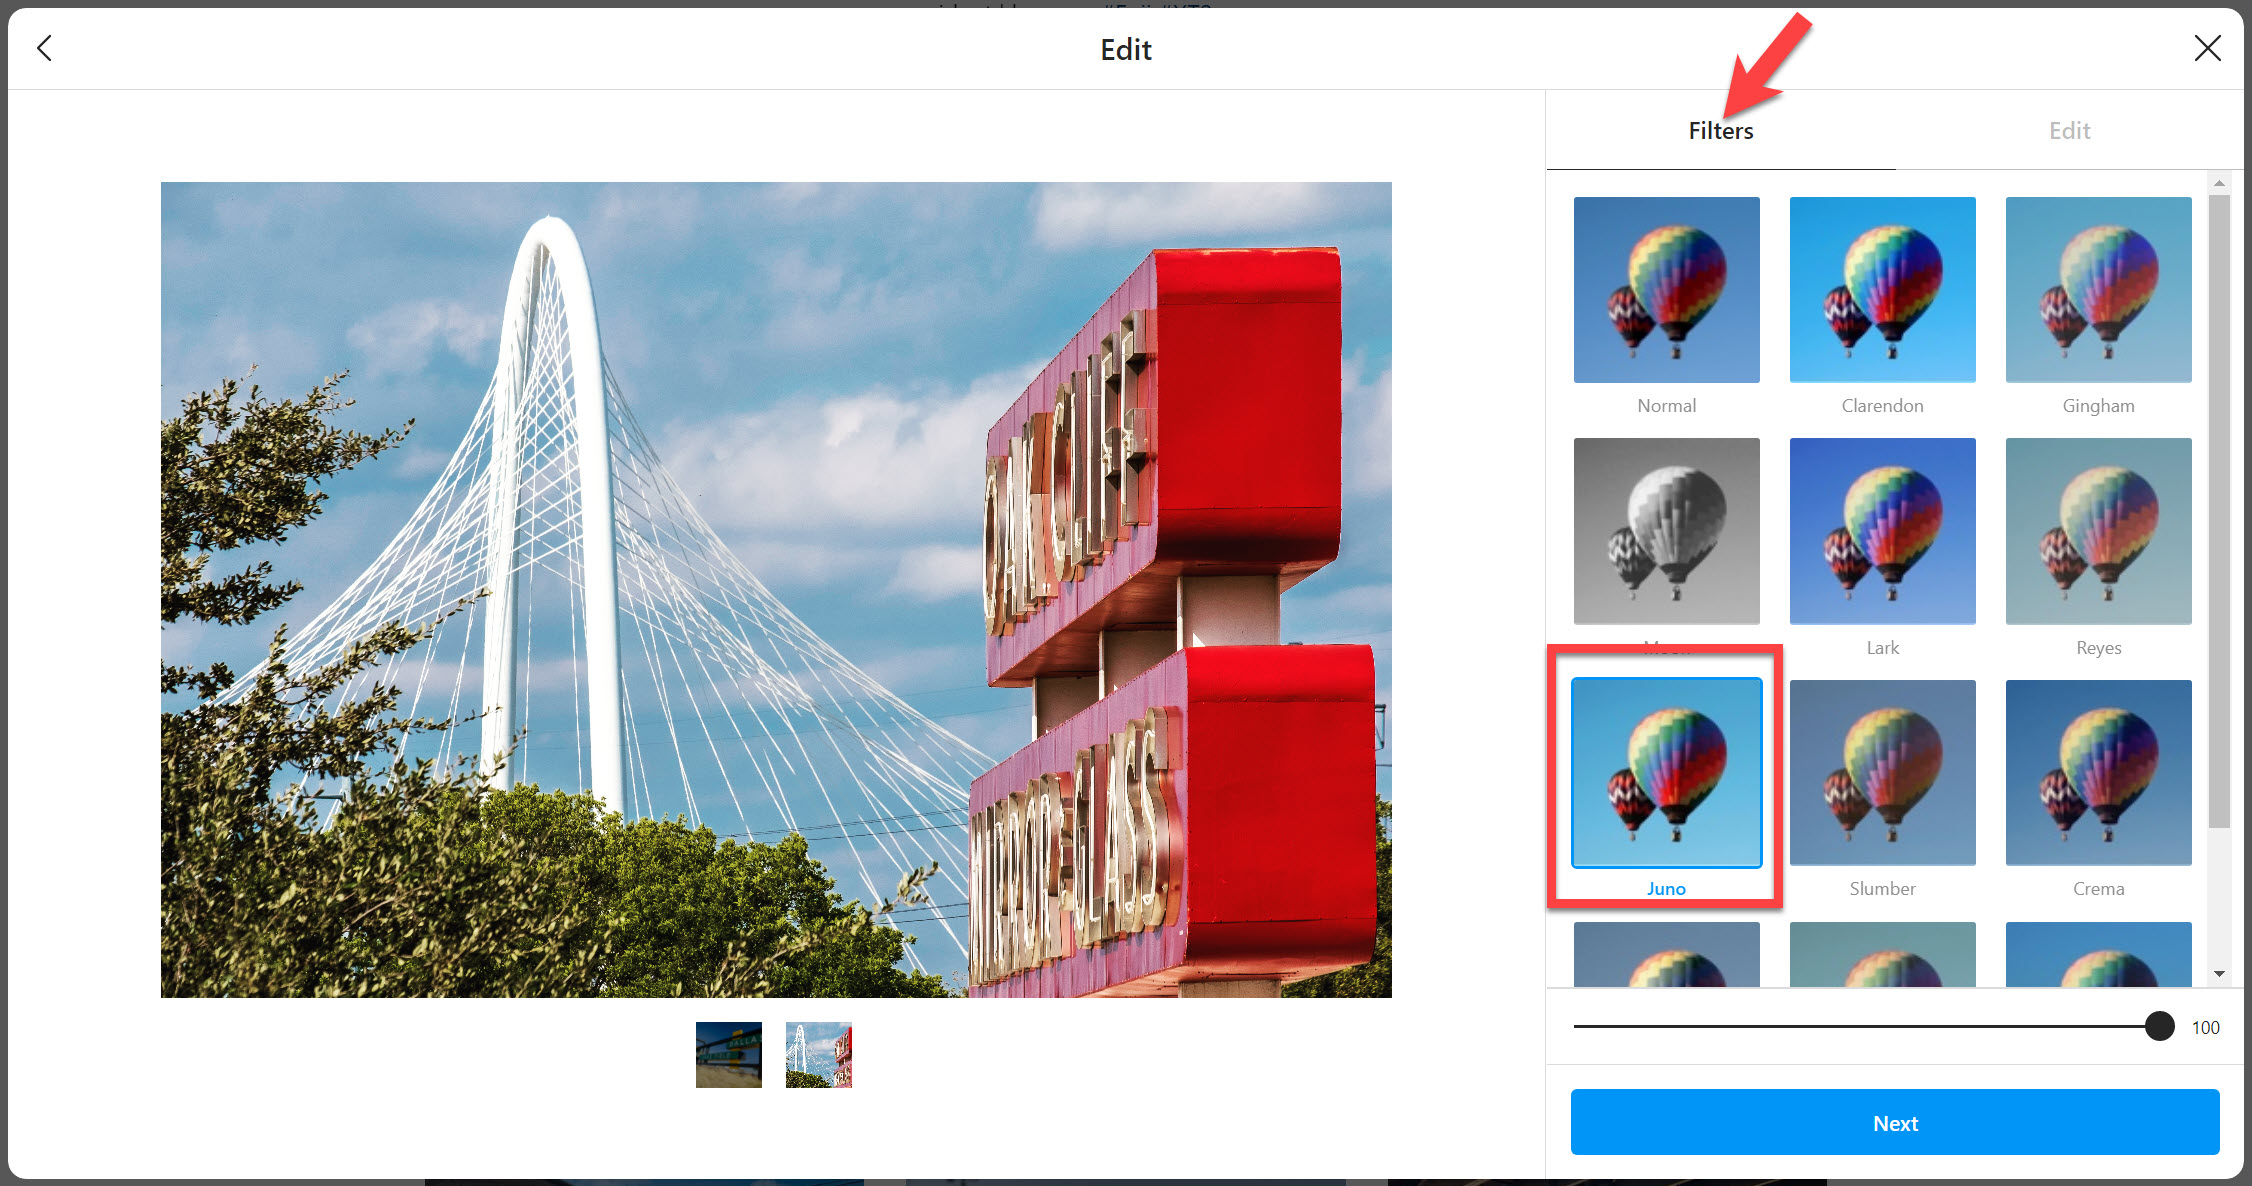
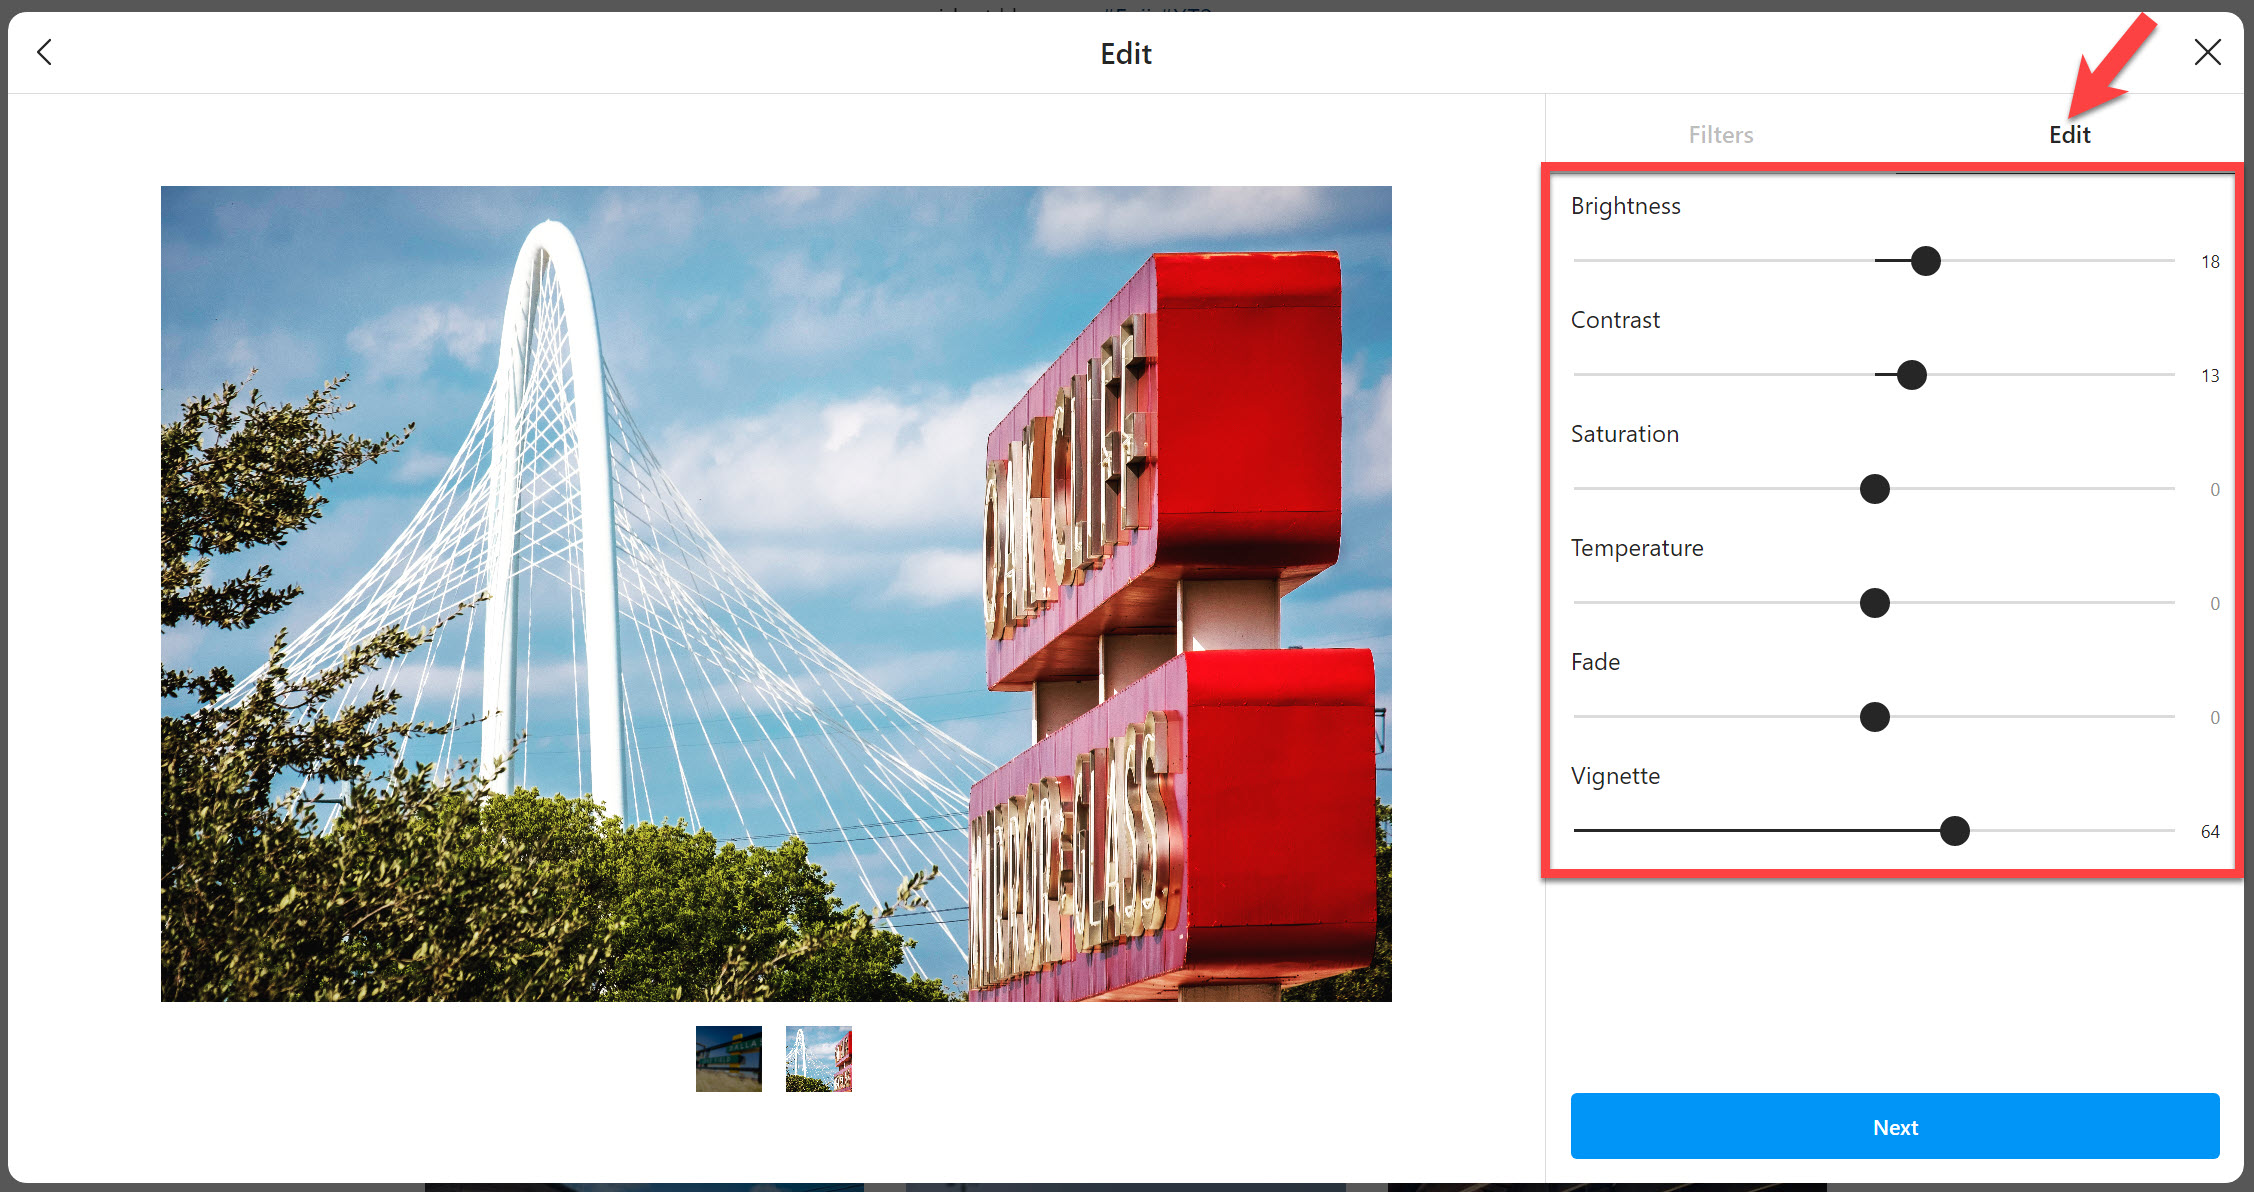
Step 7: Edit the photo(s) as needed. Click the Next button to continue.
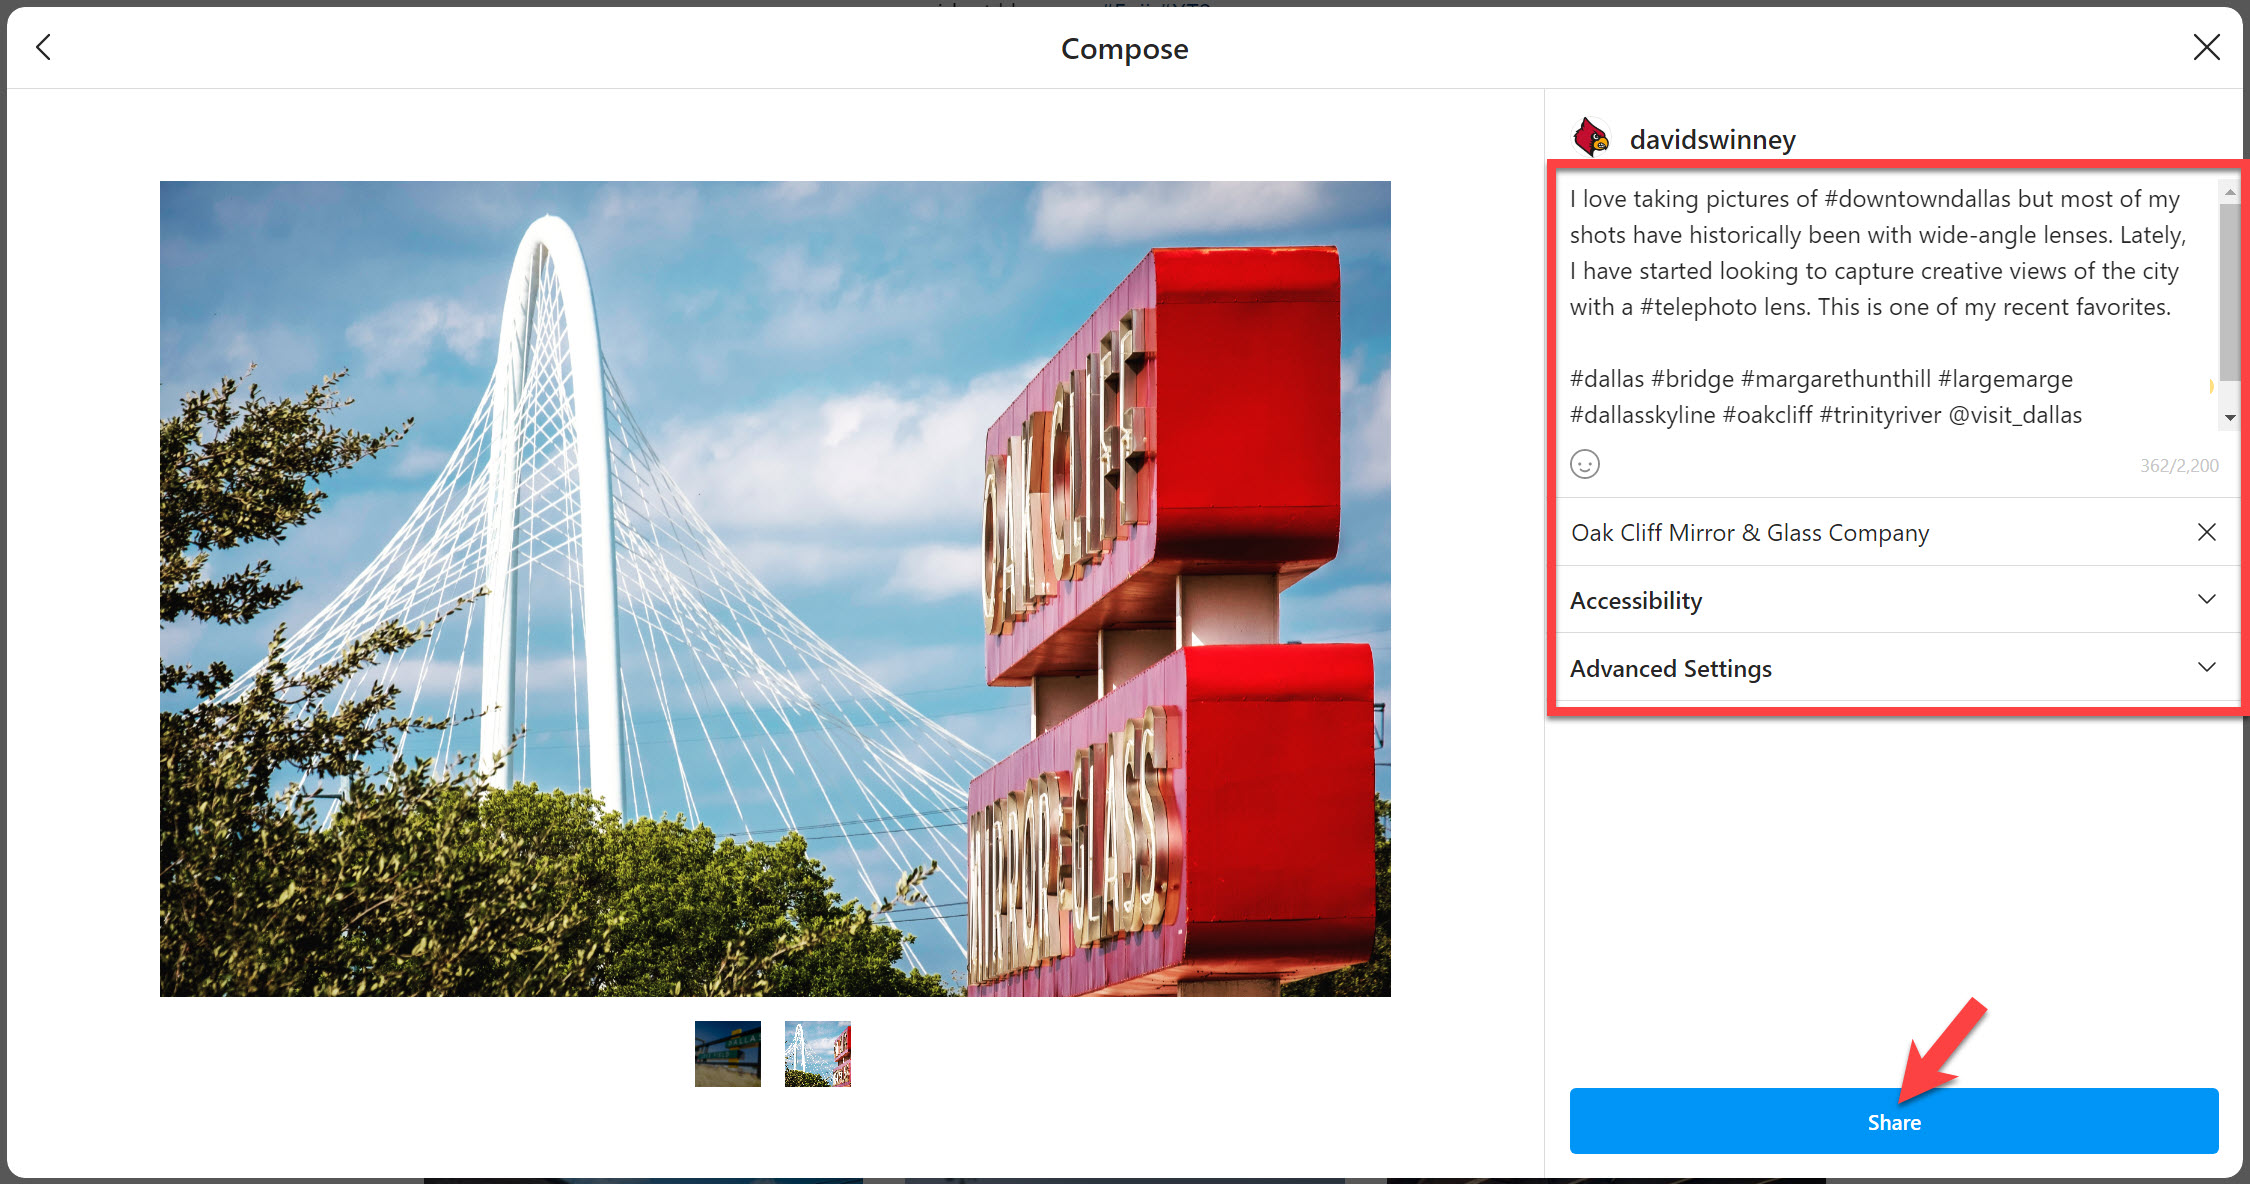
Step 8: Add captions and hashtags as appropriate, then click the Share button to post the photo(s) to Instagram.
That's all there is to it! Good luck and happy gramming.
NOTE: Instagram is rolling this feature out to all existing accounts; if your account does not yet have this capability, keep checking. It's definitely coming.